
Prerequisites
- A Comtrex EPOS installation with the Real Time Ordering (RTO) interface enabled
- The Comtrex server’s address (host or IP, plus port if it isn’t 80) and the vendor name Zonal has configured for storekit — ask your Zonal account manager if you don’t have them
- The Comtrex server reachable from the internet, or a route Zonal has agreed with storekit
- The Comtrex integration enabled on your storekit account
If Comtrex does not appear in your Integrations list, the integration isn’t enabled for your account yet — contact storekit support.
Connect Your Till
1
Open the Comtrex integration
Go to Stores → your store → Settings → Integrations, then select Comtrex.
2
Enter the server details
Fill in Server IP Address and Vendor ID. Enter the address without a scheme — storekit adds
http:// for you — and include the port if the RTO interface isn’t on port 80, for example 192.168.1.20:16700. Click Save.3
Load the media types from the till
Click Load from till. The button stays disabled — with the note Save the connection details to load anything from the till. — until the address and vendor ID you see on screen have been saved. storekit asks the Comtrex server for its media list; when it succeeds the status line reads Connected — media types loaded from the till. and the button changes to Reload. If it fails, check the address and that the server is reachable — see Troubleshooting.
4
Map the till media
Pick a Tip ID, Discount ID and Payment Type ID from the lists the till returned, and enter the Sales Type Number online orders should use (see below).
5
Turn the integration on
Switch Integration Status on. The label next to it reads Enabled - sending orders to Comtrex when the store is live.
6
Save
Click Save.
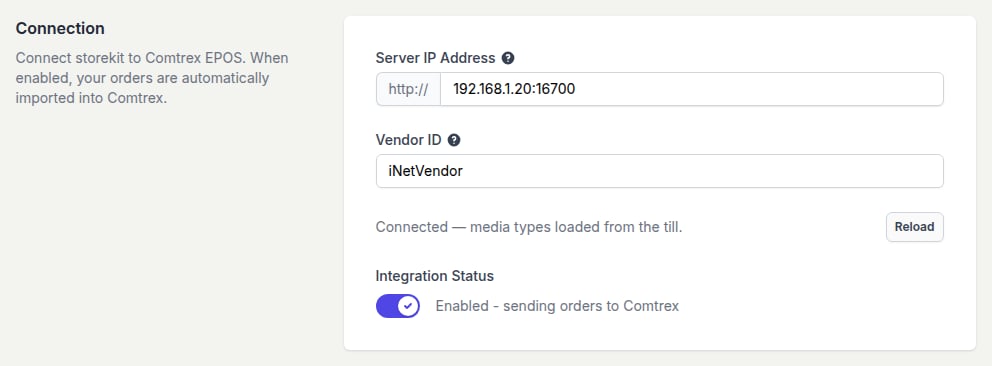
The Connection section after a successful Load from till
Each storekit store connects to a single Comtrex server. For multi-site accounts, repeat this for every store.
Media Mapping
Comtrex records tips, discounts and payments against media types configured on the till. storekit needs to know which media to use for each, so create them on the till first (your Zonal account manager can do this), then click Load from till and pick them here.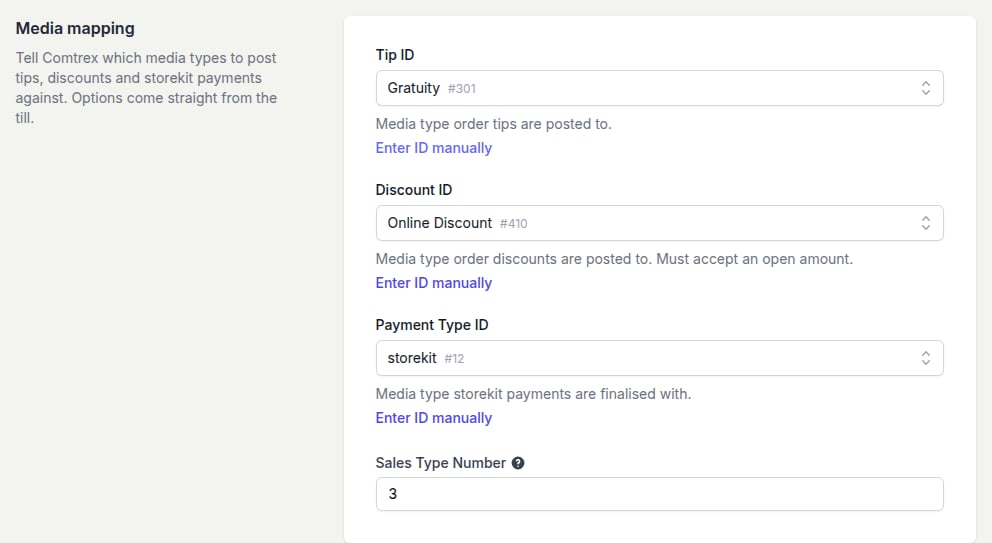
Media mapping — options come straight from the till, shown as name and media number
Each media dropdown has an Enter ID manually link beneath it. Use it if the media type you need isn’t in the list the till returned, or if you’re setting up before the till is reachable.
Other Connection Settings
- Integration Status — the master switch. When it’s off the settings are kept but nothing is sent to Comtrex, and the label reads Disabled - not sending orders to Comtrex. Turning it on also sets the store’s POS provider to Comtrex.
- Reload — re-fetches the media list from the till. Use it after Zonal adds a new media type.
Next Steps
Menu Linking & Price Sync
Give every product and modifier the till’s item number
Orders
Choose what’s sent alongside each order