
Before You Start
Catering is enabled by storekit on request. If Orders → Catering is not in your sidebar, contact support. To configure booking availability and minimum spend, see Set Up a Catering Store.Review the Lookahead
1
Open the catering workspace
Go to Orders → Catering. Use the store selector at the top right to choose one or more stores, or leave it empty to include all your stores.
2
Choose the planning period
The page opens on Next 14 days. The fixed options are Next 7 days, Next 14 days, Next 21 days and Next 30 days.The arrows either side move the window forward or back; you cannot move it earlier than today. This changes the view, not how far ahead customers can book.
3
Check the busiest dates
Read the summary for today’s orders and value, the next 7 days, pipeline value for the selected period, and the busiest day. Click a day in the strip to jump to its orders. The bars compare the value booked each day.
4
Review orders and delivery warnings
Work through the date groups. Click an order row for its details, the item count for its items, or a note badge for Allergens & notes.Catering deliveries without a booked courier are highlighted in amber. A courier booking waiting for a rider is not treated as a missing booking.
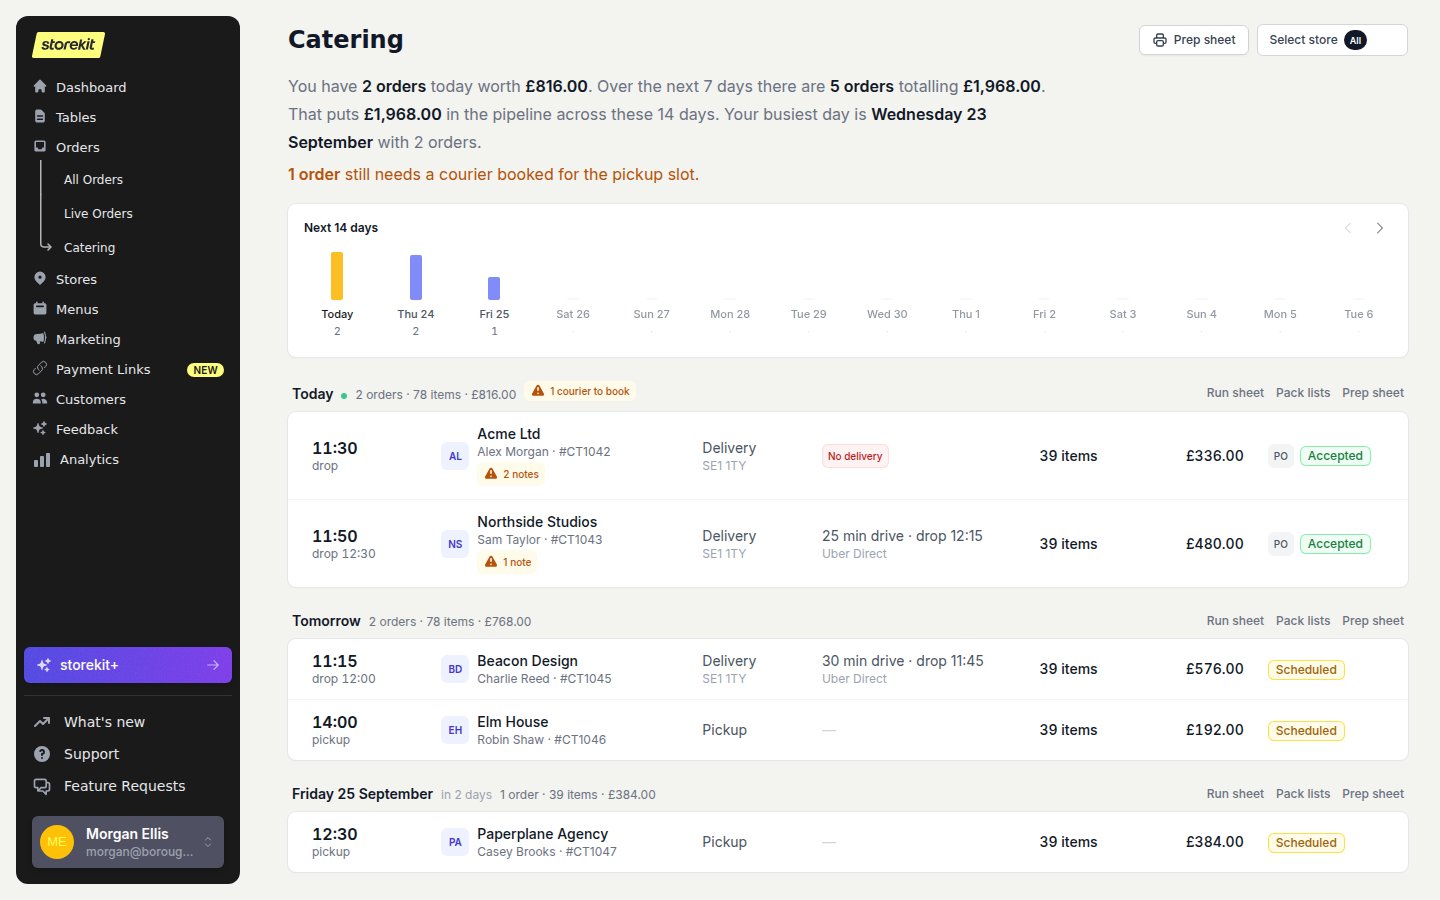
The lookahead groups orders by event date and highlights deliveries needing a courier. Example data.
Resolve Delivery Warnings
Open a flagged order and check its delivery details against your delivery integration. There is no button on the catering page or order page to book a courier by hand. See Uber Direct or your provider’s guide under Integrations for when a request is sent and what to check if one is missing.Prepare the Day’s Paperwork
Each date group has three links on the right, filtered to your selected stores:- Run sheet — print the dispatch timeline.
- Pack lists — print one checklist per order.
- Prep sheet — total the kitchen’s items for that date.