
There is no storekit app to download for merchants on iOS or Android. Live Orders runs in any modern browser at
dashboard.storekit.com, including on a phone or tablet — see Supported Browsers for the version minimums.The Live Orders Page
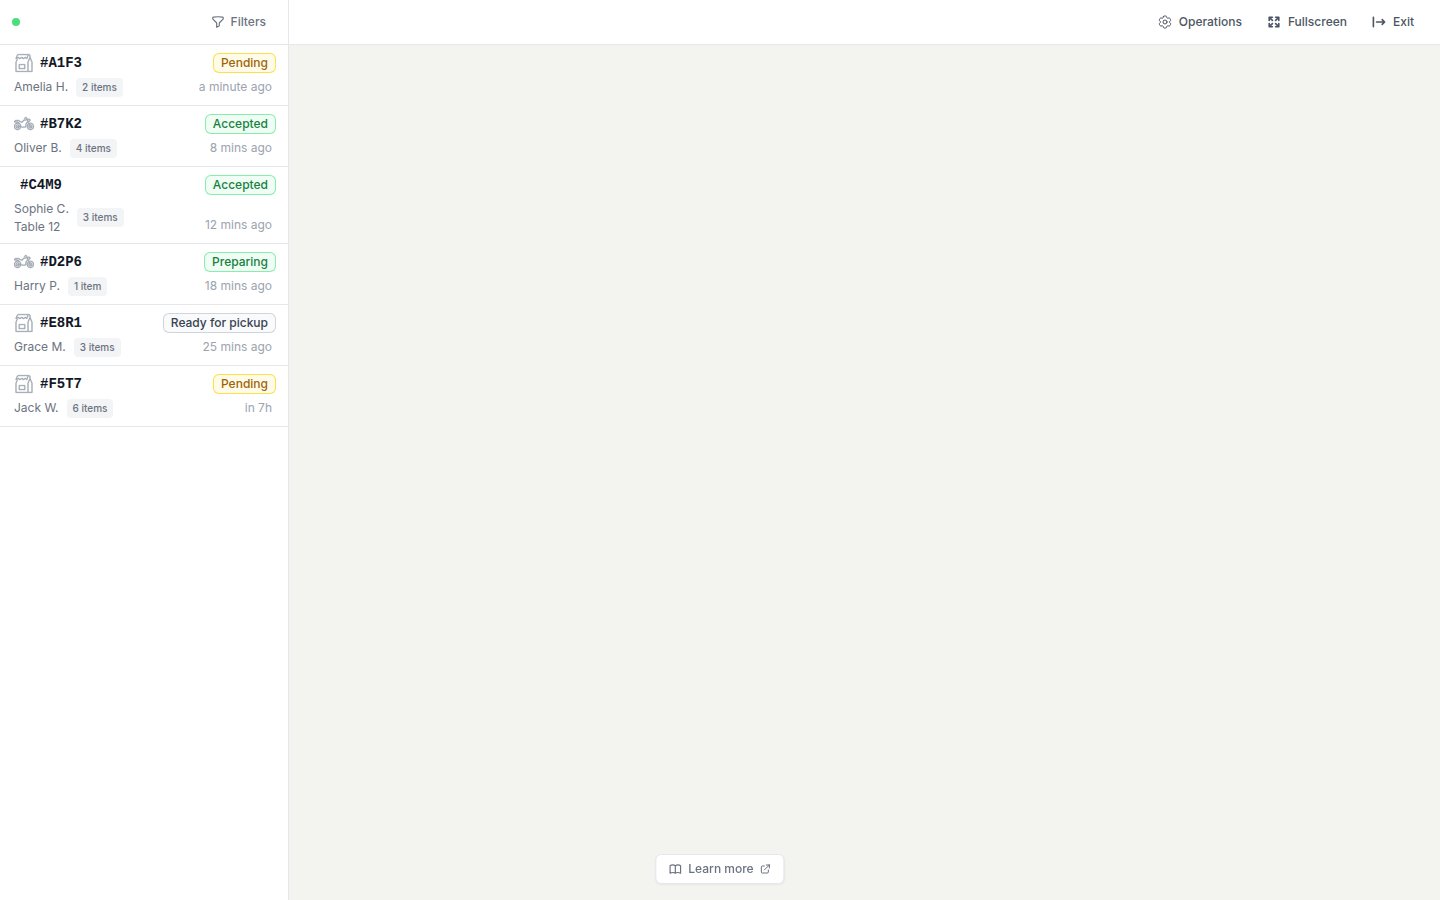
A new-order sound plays each time an order arrives while the page is open. It plays once per order and there is no on/off switch or volume control for it in the dashboard.
Pre-Orders and Future Orders
Live Orders shows today’s orders only. Pre-orders for future dates do not appear here until the day they are due; find them under Orders → All Orders (see All Orders and Exports) or, for scheduled catering, Orders → Catering (see Plan Upcoming Catering Orders).Working an Order
Click an order to open it. The header repeats the order code and store, with Delay, Print Item Labels, Print and More actions. Below it are the customer, the items and totals, and a Timeline where staff can leave comments only your team can see.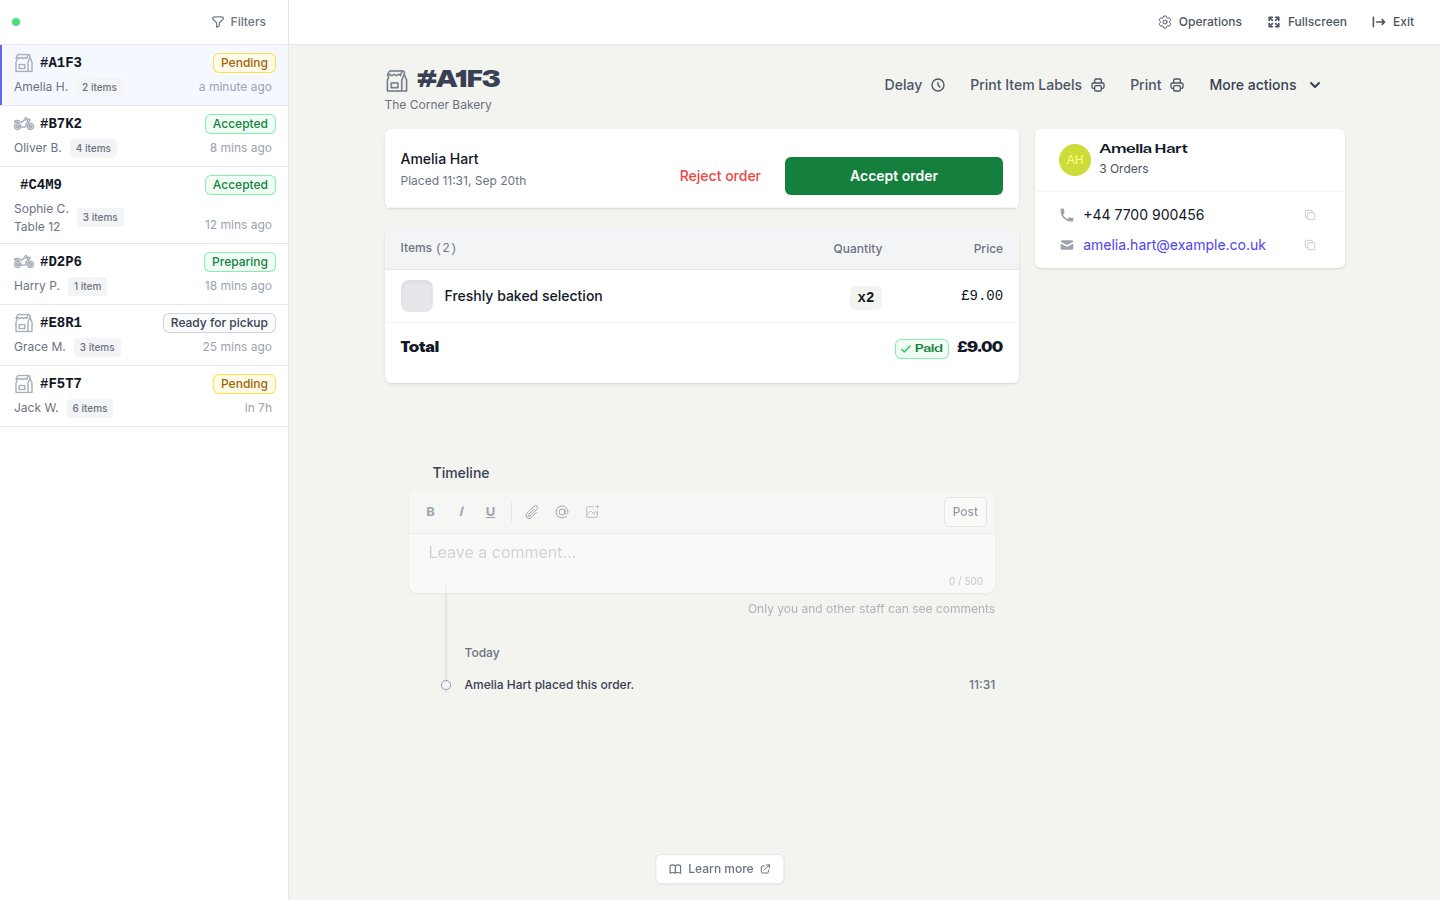
Accepting or Rejecting
A Pending order shows Accept order and Reject order. Accepting confirms the order to the customer. Rejecting notifies the customer but does not refund the payment automatically — see Rejected before you use it. If you would rather skip this step, turn on Auto Accept — see Settings That Affect Live Orders.Progressing the Order
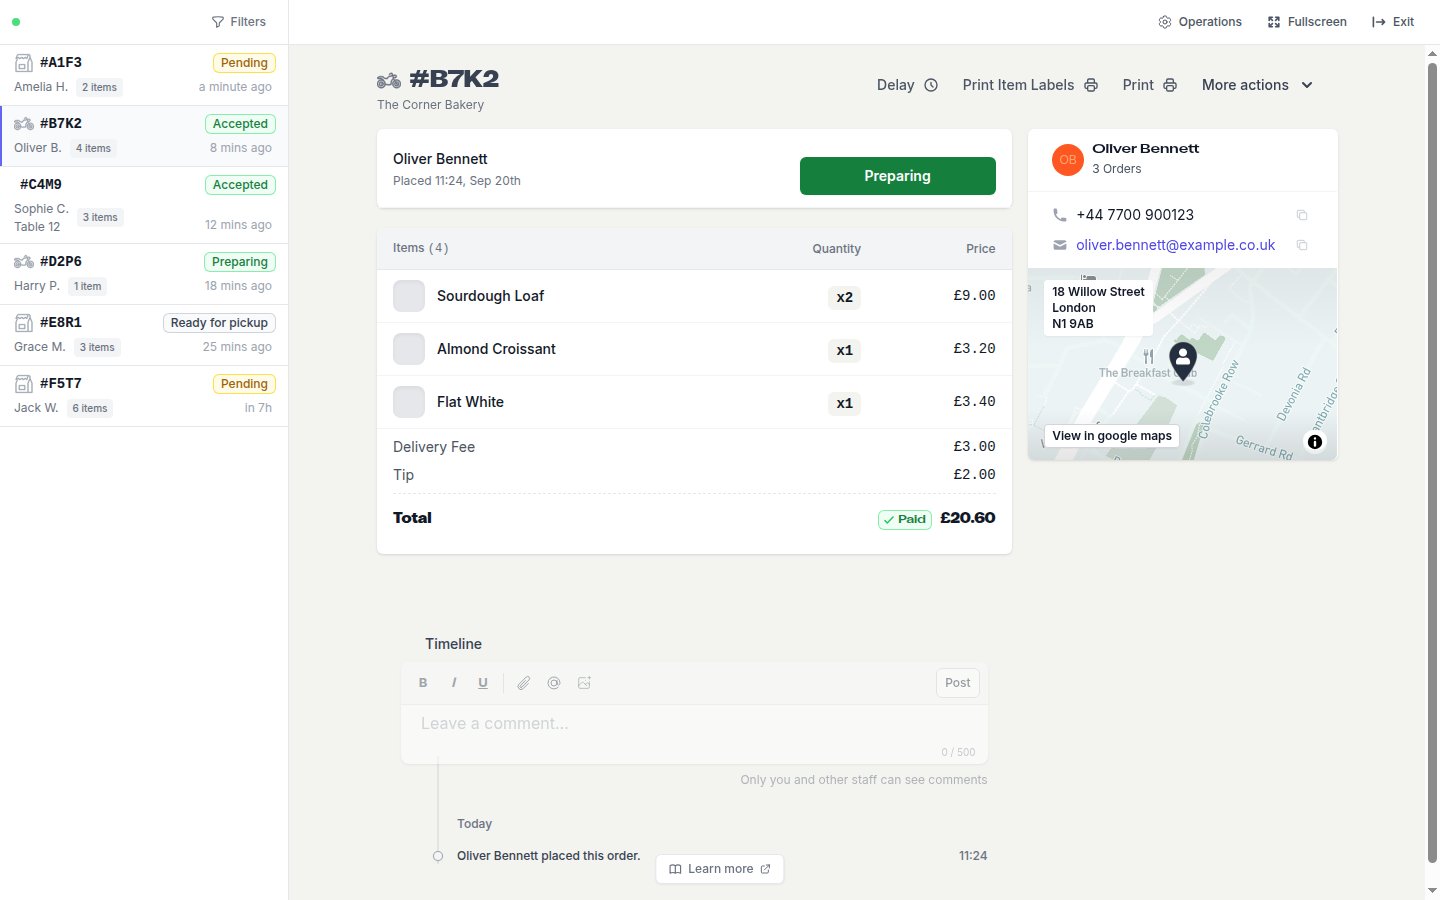
Once accepted, the green button moves the order to its next status. The label depends on the fulfilment method:
Ready for pickup and Out for Delivery trigger the matching customer notification. What every status means is on Order Statuses.
Running Late
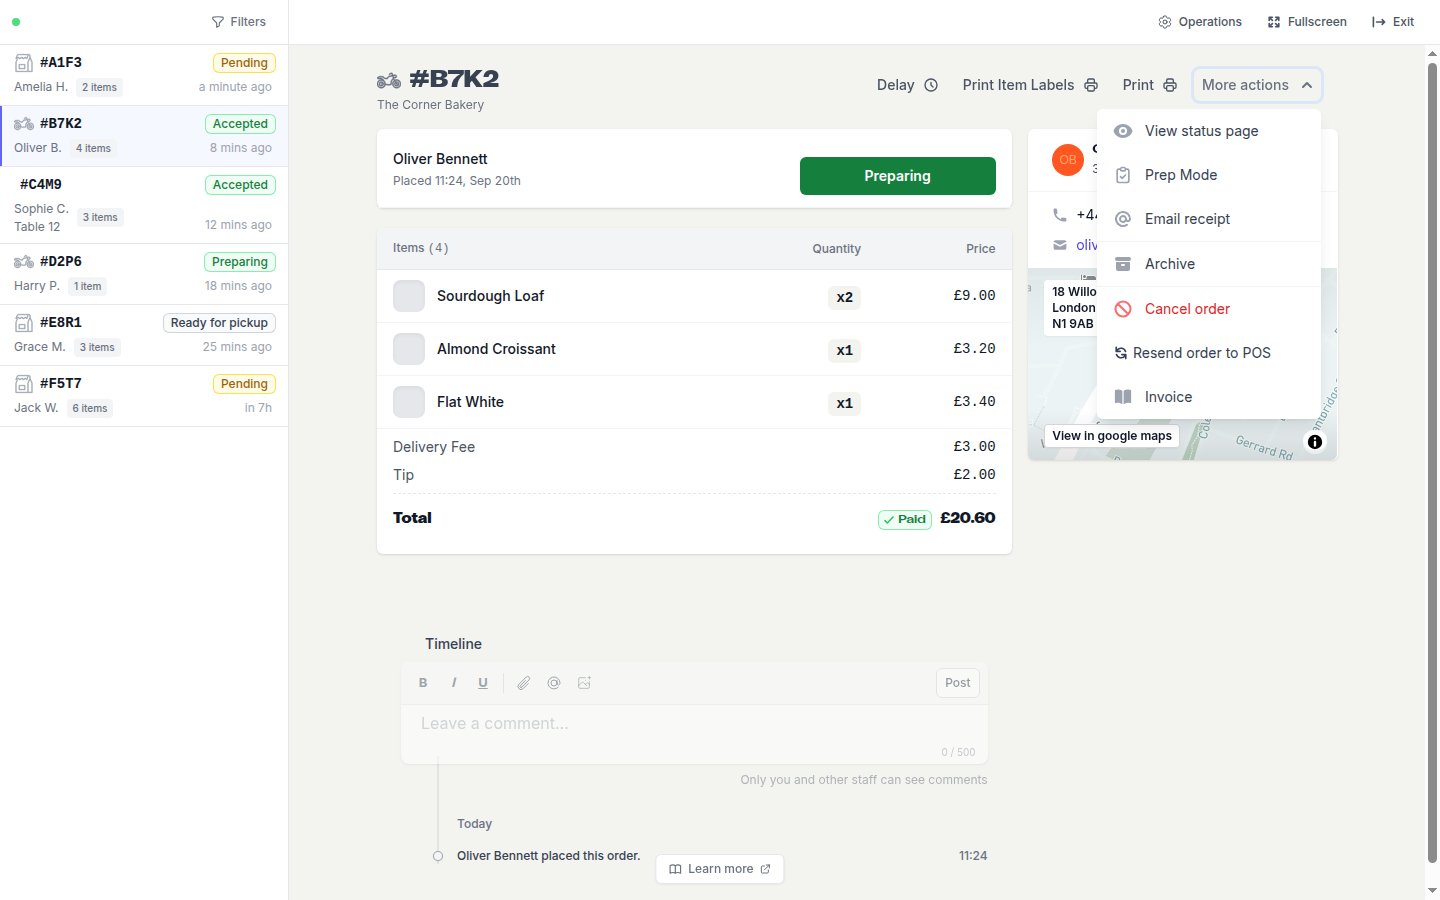
Click Delay to push the estimated time back by 1, 2, 5, 10 or 20 minutes. storekit emails customers who provided an email address and texts customers who provided a phone number when Text (SMS) notifications is enabled. See Order Delay Notifications for the customer’s view.More Actions
Filtering the Feed
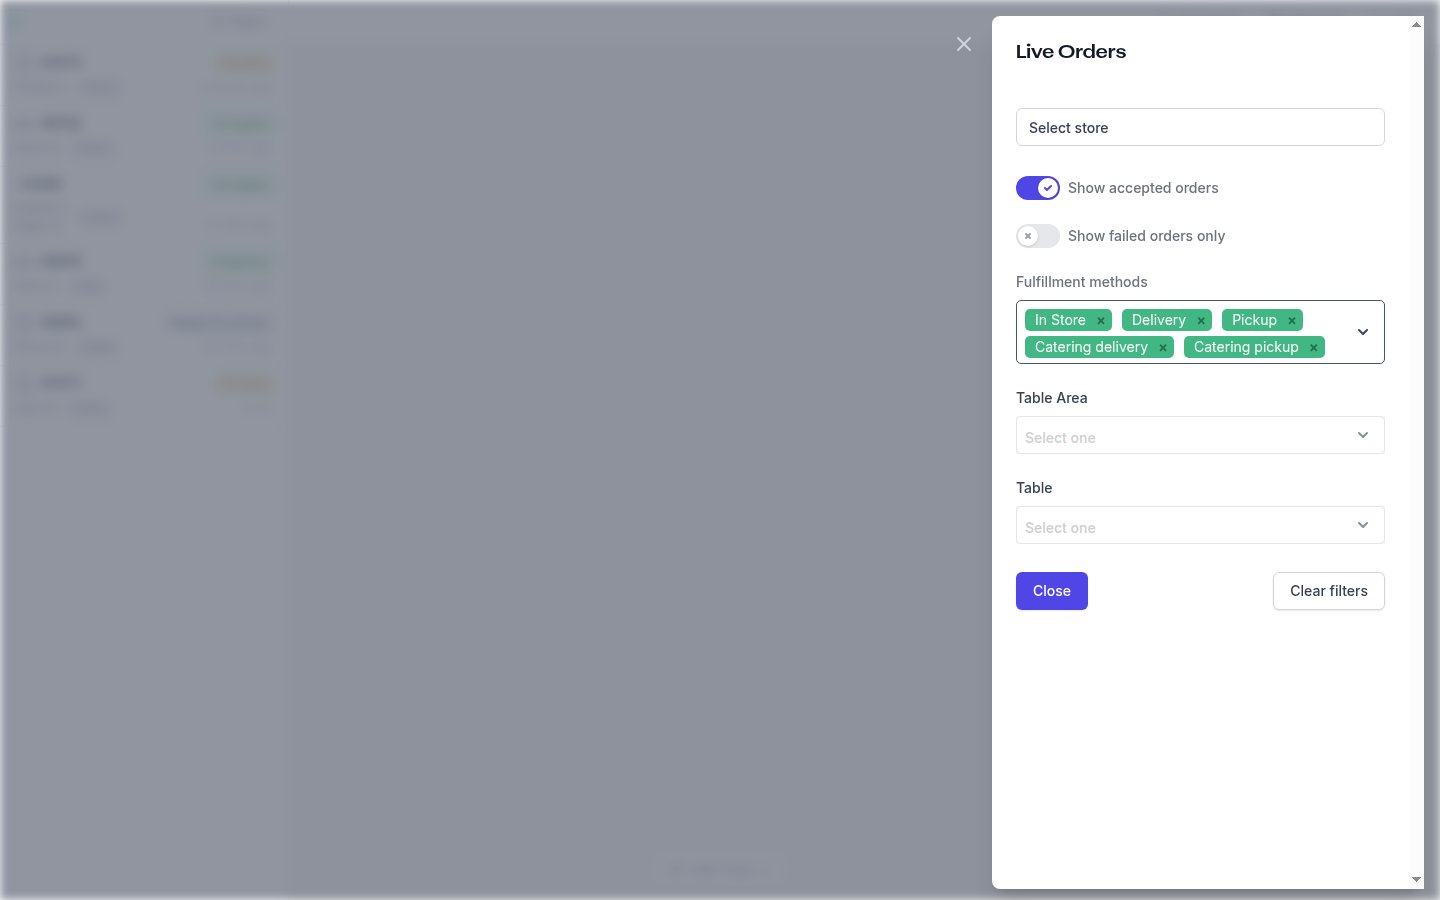
- Select store — for accounts with more than one store. Leave it empty to see every store; the store name then appears on each row.
- Show accepted orders — turn off to see only orders still waiting for a decision.
- Show failed orders only — orders that could not be sent to the POS. See Failed.
- Fulfillment methods — In Store, Delivery and Pickup. Stores with catering enabled also see Catering delivery and Catering pickup. This list is fixed.
- Table Area and Table — for in-store orders, once a single store is selected.
Quick Store Settings From Live Orders
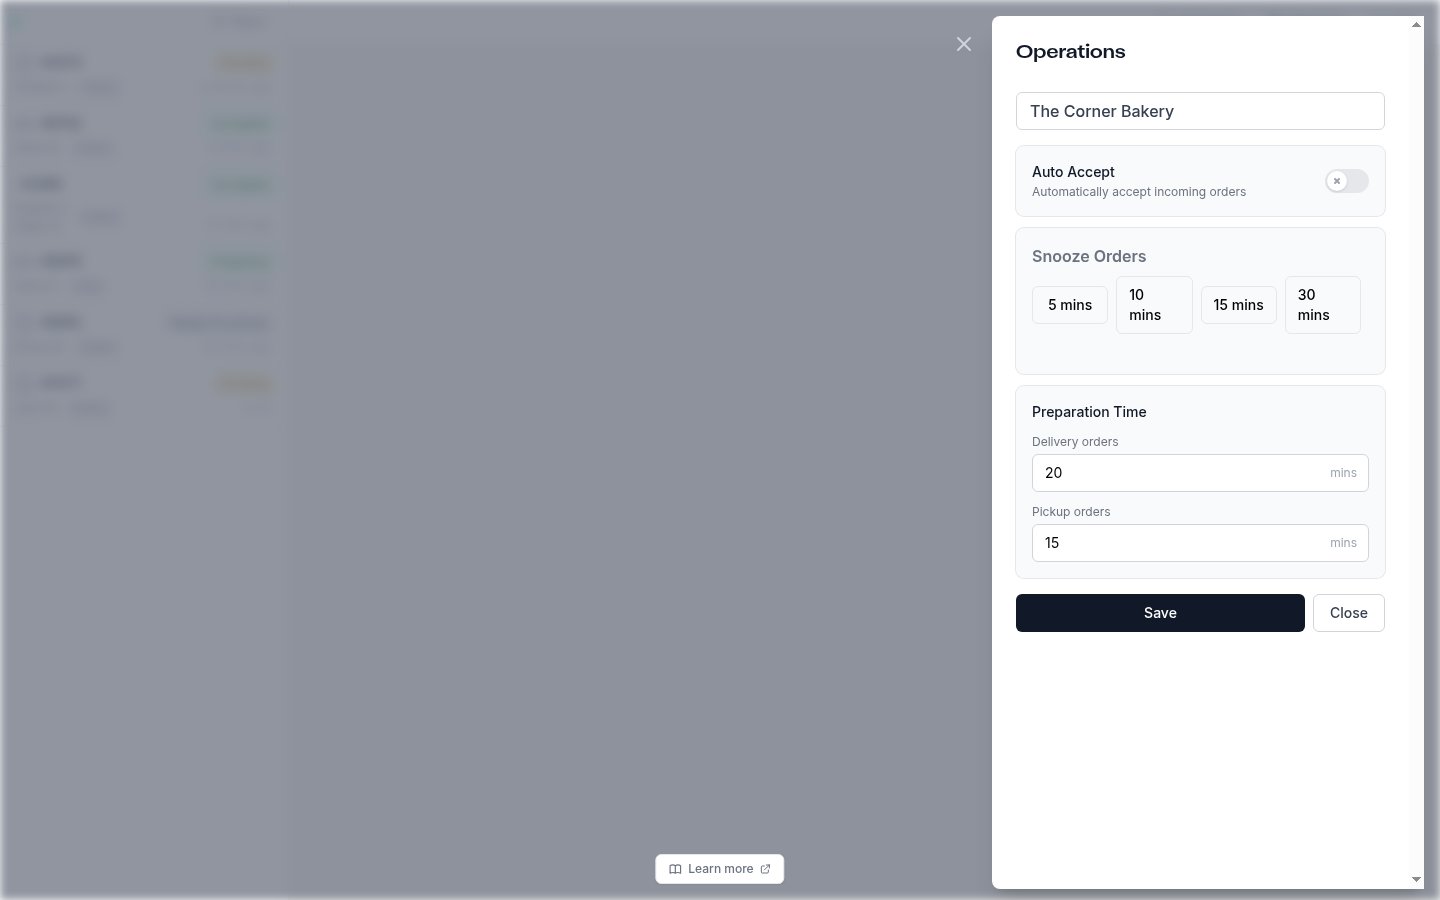
- Auto Accept — accept every incoming order automatically. The same setting as in the store’s settings below.
- Snooze Orders — stop taking orders for 5 mins, 10 mins, 15 mins or 30 mins while the kitchen catches up. Ordering resumes on its own; see Disable Ordering for longer closures.
- Preparation Time — the minutes quoted to customers before they order, set separately for Delivery orders and Pickup orders (a single Average prep time for Order & Pay stores).
Settings That Affect Live Orders
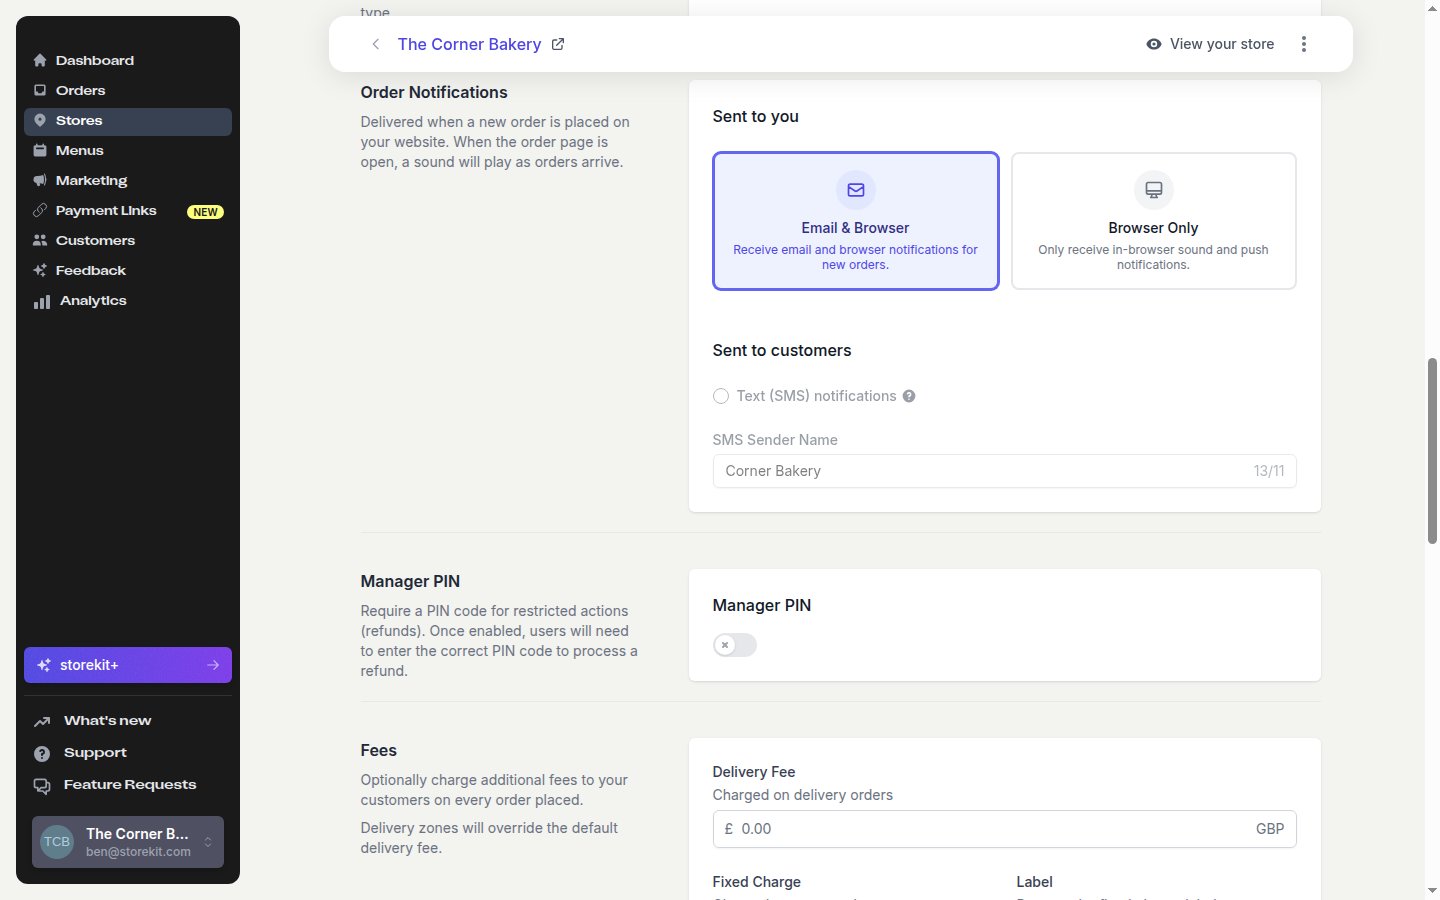
These live at Stores → your store → Settings → Operations and change how orders arrive and progress. The full page is described in Operations Settings.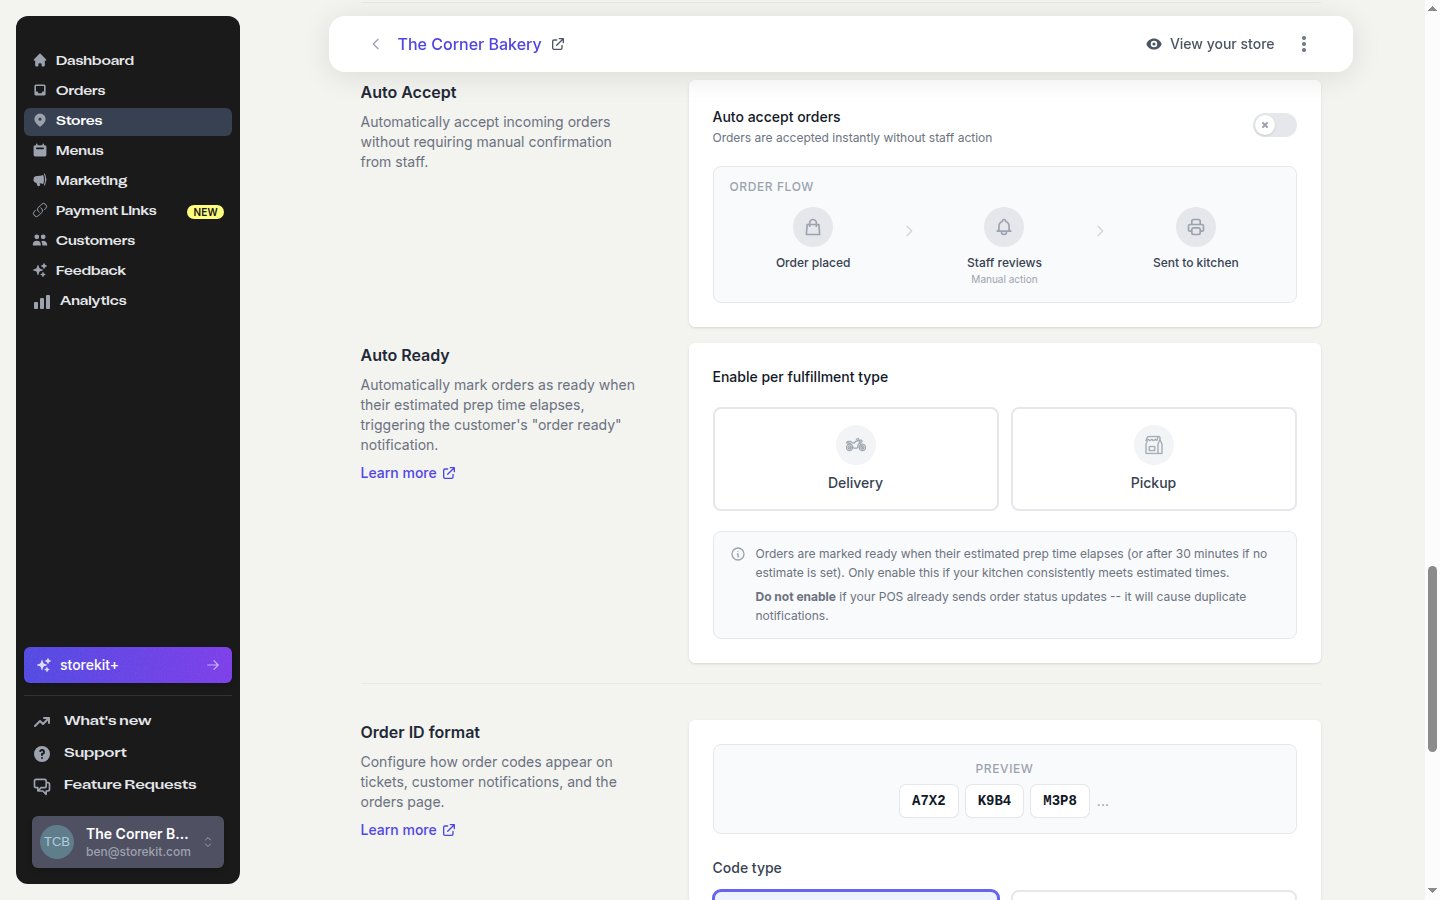
Troubleshooting
Orders are not appearing
Orders are not appearing
- Look at the dot in the top-left corner. If it is red with Connection Error, check the internet connection, then refresh the page. Try Chrome or Edge, and clear the browser cache if it stays red.
- Open Orders → All Orders to check whether the order exists — it may be a pre-order for a future date, which does not show in Live Orders until that day.
The new-order sound does not play
The new-order sound does not play
The sound plays once per new order while Live Orders is open and on screen. It does not repeat until you acknowledge the order, and there is no on/off switch or volume control for it in the dashboard. Work through these in order:
- Turn the device volume up. On an iPhone or iPad, also check the hardware silent switch — it silences browser sound even with the volume up.
- Make sure the browser tab is not muted (right-click the tab and look for Unmute site) and that the dashboard is allowed to play sound in the browser’s per-site settings.
- Click once anywhere on the page after it loads. Browsers block sound until the page has been interacted with, so a screen nobody has touched since loading stays silent. A Sound notification unavailable message means the browser refused to play the sound — click the page, and the next order will play it.
- Use Google Chrome (or Edge). This fixes most “no sound” reports: other browsers, especially in-app or embedded ones, apply stricter audio rules.
- Keep the tab open and in the foreground. The sound only plays for orders that arrive while Live Orders is on screen; nothing replays when you come back to it.
- Check what the store network allows. The sound is downloaded from storekit’s CDN (
ucarecdn.com), so a locked-down network, firewall or content filter can block it. If it cannot be downloaded the dashboard shows Sound cannot be loaded and falls back to a very short, quiet tone. Allowucarecdn.comon the network.
Orders arrive but nobody notices
Orders arrive but nobody notices
Do not rely on the browser sound alone on a shared tablet — it needs that tab to stay awake and in the foreground. Add a second route that does not depend on it:
- Direct printing — a ticket prints for every order.
- Order emails to your team — Stores → your store → Settings → Operations → Order Notifications → Sent to you → Email & Browser.
- Customer-facing SMS and email are separate from staff alerts — see Customer Order Notifications.
Related Guides
For catering paperwork and individual meals, see Catering and Print Item Labels.Order Statuses
What each status means and what the customer sees.
All Orders and Exports
Search order history, bulk-accept, and export to CSV.
Kitchen Display
A ticket board for the kitchen, separate from Live Orders.
Operations Settings
Prep time, Auto Accept, Auto Ready and notifications in full.